
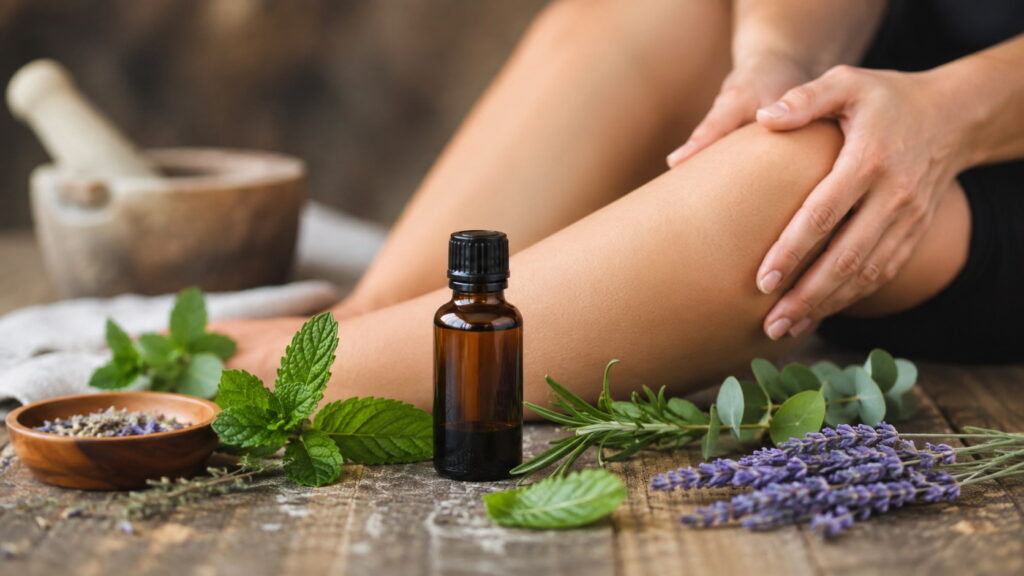
Looking for an essential oil recipe for pain and inflammation that is easy to make and practical to use? A well-balanced blend of essential oils and a nourishing carrier oil can become a helpful addition to your self-care routine, especially after workouts, long days on your feet, or occasional muscle and joint discomfort.
Readers will learn how to choose the right ingredients, create a properly diluted massage oil, apply the blend safely, customize the recipe for different needs, and store it correctly for lasting freshness. Helpful tips throughout the guide focus on making a high-quality blend while avoiding common mistakes.
Recipe Snapshot
| Detail | Information |
| Prep Time | 10 minutes |
| Rest Time (Optional) | 12–24 hours for the aromas to meld |
| Total Time | 10 minutes (plus resting time if desired) |
| Yield | 2 ounces (60 ml) |
| Best For | Massage after exercise, muscle tension, everyday aches |
| Difficulty | Beginner |
| Equipment | Glass measuring cup, funnel, dark glass bottle, labels |
Important: Essential oils are intended for complementary wellness practices and are not a substitute for medical treatment. Persistent, severe, or unexplained pain should always be evaluated by a healthcare professional. The U.S. National Center for Complementary and Integrative Health offers evidence-based information about aromatherapy at https://www.nccih.nih.gov/health/aromatherapy.
In This Article
Essential Oil Recipe for Pain and Inflammation: A Natural Blend That Actually Works
Homemade massage oils allow complete control over every ingredient, making them a popular choice for anyone who prefers simple, customizable wellness products. Careful blending creates a smooth oil that spreads easily over the skin while delivering the pleasant aroma of carefully selected botanicals.
Rather than relying on a single essential oil, experienced DIY makers often combine several complementary oils. Each contributes a unique aromatic profile while creating a balanced blend suitable for massage.
What Makes a Good Pain Relief Oil Blend?
Several characteristics separate a thoughtfully made blend from one mixed together without a plan:
- Proper dilution to help reduce the chance of skin irritation.
- A nourishing carrier oil that glides smoothly during massage.
- Balanced aromas instead of one overpowering scent.
- Fresh, quality ingredients with good storage practices.
- Gentle application as part of a relaxing massage routine.
Massage itself can temporarily ease muscle tightness by encouraging relaxation and improving circulation to worked muscles. Combining massage with aromatic essential oils often creates a calming self-care experience many people enjoy after physical activity.
Who May Enjoy This Recipe?
Many readers prepare a blend like this for:
- Recovery after exercise
- Tired shoulders from desk work
- Mild muscle soreness after gardening
- Occasional joint stiffness
- Relaxing evening massages
- Self-care routines after long days
Realistic Expectations Matter
Natural products work differently for everyone. Essential oils should be viewed as supportive wellness ingredients rather than miracle cures. Regular stretching, hydration, adequate sleep, and good movement habits remain equally important for maintaining everyday comfort.
Why Essential Oils May Help with Pain and Inflammation
Essential oils contain naturally occurring aromatic compounds extracted from plants. Although research continues to explore their effects, many people enjoy using certain oils during massage because of their cooling, warming, or relaxing sensory qualities.
Several essential oils have become especially popular in DIY massage recipes because they pair well together while creating refreshing herbal aromas.
Why Carrier Oils Are Just as Important
Carrier oils deserve as much attention as the essential oils themselves.
A quality carrier oil:
- Dilutes concentrated essential oils safely
- Helps spread the blend evenly
- Moisturizes the skin
- Reduces evaporation
- Makes massage more comfortable
Popular carrier oils include:
| Carrier Oil | Texture | Best Uses |
| Sweet Almond Oil | Medium | Everyday massage |
| Fractionated Coconut Oil | Light | Fast absorption |
| Jojoba Oil | Silky | Sensitive skin |
| Grapeseed Oil | Very light | Sports massage |
| Avocado Oil | Rich | Dry skin |
Massage Plays an Important Role
Gentle massage helps distribute the oil evenly while encouraging muscles to relax. Slow circular motions generally work better than firm pressure when muscles already feel tender.
Many people find applying the blend after a warm shower especially pleasant because clean, slightly warm skin absorbs carrier oils more easily.
Safety Always Comes First
Responsible DIY recipes always prioritize safety.
Remember these guidelines:
- Never apply undiluted essential oils directly to skin.
- Perform a patch test before the first full application.
- Avoid contact with eyes, mouth, and broken skin.
- Wash hands after application.
- Consult a healthcare professional before use during pregnancy, while breastfeeding, or if managing chronic medical conditions.
Ingredients for the Best Essential Oil Recipe for Pain and Inflammation
Choosing quality ingredients makes the biggest difference in both aroma and overall experience. Fresh oils with proper dilution create a blend that feels pleasant during massage and stores well for future use.
Ingredient List
Carrier Oil
- 2 ounces (60 ml) sweet almond oil
- Alternative: jojoba, grapeseed, or fractionated coconut oil
Essential Oils
- 8 drops lavender essential oil
- 6 drops peppermint essential oil
- 6 drops eucalyptus essential oil
- 5 drops frankincense essential oil
- 5 drops ginger essential oil
Total essential oil concentration remains appropriate for most healthy adults when blended into 2 ounces of carrier oil.
Why Each Ingredient Is Included
Lavender Essential Oil
Provides a calming floral aroma that balances stronger herbal notes while making the blend pleasant for evening use.
Peppermint Essential Oil
Adds a refreshing cooling sensation many people associate with post-workout massage oils.
Eucalyptus Essential Oil
Contributes a crisp, clean scent that blends naturally with peppermint and lavender.
Frankincense Essential Oil
Offers warm, resinous notes that deepen the aroma while complementing herbal oils.
Ginger Essential Oil
Brings subtle warming characteristics and earthy complexity that work particularly well in massage blends designed for tired muscles.
Ingredient Substitutions
Missing one ingredient doesn’t mean the recipe can’t be made successfully.
| Instead of | Try |
| Sweet almond oil | Jojoba oil |
| Grapeseed oil | Fractionated coconut oil |
| Frankincense | Copaiba |
| Ginger | Black pepper (well diluted) |
| Lavender | Roman chamomile |
Avoid increasing the total number of essential oil drops when making substitutions. Maintaining the overall dilution helps keep the blend skin-friendly.
Equipment You’ll Need
- Small glass measuring cup
- Mini funnel
- 2-ounce amber or cobalt glass bottle
- Small stirring utensil
- Waterproof label with preparation date
Dark-colored glass bottles help protect essential oils from light exposure, preserving both fragrance and quality for a longer period.
Choosing High-Quality Oils for Better Results
Ingredient quality has a noticeable impact on both the aroma and the overall experience of using an essential oil recipe for pain and inflammation. Fresh, pure oils produce a cleaner scent and are less likely to contain unwanted additives that dilute the blend.
What to Look for When Buying Essential Oils
Shopping for essential oils can feel overwhelming because countless brands make similar claims. Paying attention to a few details helps narrow the choices.
Look for products that include:
- The botanical (Latin) name of the plant.
- Country of origin or sourcing information.
- Extraction method, such as steam distillation or cold pressing.
- Batch or lot number for quality tracking.
- Dark glass bottles to protect the oil from light.
- No added fragrances, fillers, or mineral oils.
Reputable companies are also transparent about ingredient sourcing and frequently provide educational resources explaining how their oils are produced.
Organic vs. Conventional Essential Oils
Organic certification can be a worthwhile feature, particularly for oils derived from plants that are commonly treated with pesticides. Even so, conventional oils from trusted suppliers may still be excellent choices when produced with careful quality standards.
Quality often depends more on proper harvesting, extraction, and storage than on a single certification label.
Signs of Freshness and Purity
Fresh essential oils typically have:
- A clean, well-defined aroma
- Clear labeling with an expiration or best-by date
- Consistent color appropriate for the specific oil
- Secure, leak-free packaging
Strong chemical odors, cloudy appearance (unless naturally expected), or unusually low prices may indicate a lower-quality product.
Ingredients Worth Avoiding
Reading labels carefully can prevent disappointment.
Avoid products containing:
- Synthetic fragrance oils
- Artificial colors
- Mineral oil blends sold as essential oils
- Undisclosed proprietary fragrance mixtures
- Alcohol added without explanation
Pure essential oils should list only the botanical oil unless the product is intentionally marketed as a pre-diluted blend.
Step-by-Step Essential Oil Recipe for Pain and Inflammation
Preparing your own massage oil takes only a few minutes, yet careful measuring makes a significant difference. Following a consistent process also helps produce the same balanced blend every time.
Equipment
Gather everything before you begin:
- Glass measuring cup
- Small funnel
- Stirring utensil or glass rod
- 2-ounce (60 ml) amber glass bottle
- Waterproof label
Tip: Clean and thoroughly dry all equipment before mixing. Even small amounts of water can shorten the shelf life of homemade oil blends.
Step 1: Measure the Carrier Oil
Pour 2 ounces (60 ml) of sweet almond oil into the measuring cup.
Alternative carrier oils such as jojoba or grapeseed oil may be substituted without changing the rest of the recipe.
Step 2: Add the Essential Oils
Add the oils one at a time:
- 8 drops lavender
- 6 drops peppermint
- 6 drops eucalyptus
- 5 drops frankincense
- 5 drops ginger
Adding each oil individually makes counting easier and helps maintain the intended dilution.
Step 3: Mix Thoroughly
Stir gently for about 30 seconds or swirl the measuring cup in slow circles.
Avoid vigorous shaking during the initial mixing, as excessive air exposure may slightly reduce freshness over time.
Step 4: Bottle the Blend
Place the funnel into the dark glass bottle and carefully pour in the finished mixture.
Seal the cap tightly once filled.
Step 5: Label Everything
Include:
- Recipe name
- Preparation date
- Main ingredients
Proper labeling makes future batches easier to recreate and helps monitor freshness.
Optional Resting Time
Many DIY enthusiasts prefer allowing the blend to rest for 12 to 24 hours before first use.
Resting gives the aromas time to meld, creating a smoother and more balanced scent profile.
How to Apply Your Essential Oil Recipe for Pain and Inflammation Safely
A thoughtfully blended oil works best when paired with gentle massage and proper application techniques. Using too much product rarely improves results, while measured application provides good coverage without leaving the skin overly greasy.
Best Areas for Application
Suitable areas include:
- Neck and shoulders
- Upper and lower back
- Forearms
- Calves
- Thighs
- Knees
- Feet
Avoid applying the blend to:
- Broken or irritated skin
- Eyes and eyelids
- Lips
- Inside the nose
- Other sensitive mucous membranes
How Much Should You Use?
A small amount goes a long way.
General guideline:
| Area | Approximate Amount |
| Neck and shoulders | ½ teaspoon |
| One arm | ½ teaspoon |
| One leg | 1 teaspoon |
| Lower back | 1 teaspoon |
Massage using slow, circular movements until most of the carrier oil has been absorbed.
How Often Can You Apply It?
Many adults comfortably use a properly diluted massage blend:
- After workouts
- Following physically demanding activities
- Before bedtime as part of a relaxing routine
- Once or twice daily if the skin remains comfortable
Stop using the blend if irritation develops.
Always Perform a Patch Test
Before regular use:
- Apply a small amount to the inside of your forearm.
- Wait 24 hours.
- Watch for redness, itching, burning, or irritation.
- Proceed with normal application only if no reaction occurs.
Important: Peppermint and eucalyptus oils may create a cooling sensation, while ginger may feel gently warming. Mild sensory changes are common, but persistent burning or significant irritation means the blend should be washed off with carrier oil and mild soap, then discontinued.
Consistent, careful use paired with gentle massage often creates a more enjoyable experience than applying large amounts infrequently. Taking a few extra minutes to massage the blend into tired muscles can also become a relaxing part of an evening self-care routine.
Customize the Recipe for Different Types of Discomfort
One of the biggest advantages of making your own essential oil recipe for pain and inflammation is the ability to tailor the blend to your preferences. Small adjustments can change the aroma, skin feel, or warming and cooling sensation without requiring an entirely new recipe.
Keep the overall dilution the same whenever you substitute oils. Rather than increasing the total number of drops, swap one essential oil for another to maintain a skin-friendly concentration.
Blend for Post-Workout Muscle Recovery
Muscles that feel tired after exercise often benefit from a refreshing massage blend.
Suggested blend:
- 8 drops lavender
- 8 drops peppermint
- 6 drops eucalyptus
- 4 drops frankincense
- 4 drops ginger
Light massage after stretching can make recovery sessions feel even more relaxing.
Blend for Stiff Joints
A warmer, earthier aroma works well for massage around stiff areas.
Suggested blend:
- 8 drops lavender
- 7 drops frankincense
- 6 drops ginger
- 5 drops eucalyptus
- 4 drops peppermint
Use gentle circular motions instead of applying heavy pressure around joints.
Cooling Variation
Warm weather or post-workout use may call for a fresher scent profile.
Increase:
- Peppermint
- Eucalyptus
Reduce:
- Ginger
Result: a crisp, invigorating aroma with a noticeable cooling sensation during massage.
Warming Variation
Some people prefer a cozier blend, especially during colder months.
Increase:
- Ginger
- Frankincense
Reduce:
- Peppermint
Result: a richer, comforting fragrance with less cooling effect.
Sensitive Skin Version
People with easily irritated skin often prefer a lower concentration.
Consider:
- Reducing the total essential oil drops by about half
- Using jojoba oil as the carrier
- Limiting stronger oils like peppermint and eucalyptus
- Increasing lavender slightly for a softer aroma
Expert Tip: Every skin type is different. Performing a patch test each time you introduce a new essential oil helps identify potential sensitivities before full application.
Common Mistakes That Reduce Effectiveness
A few avoidable mistakes can affect the quality, safety, and longevity of your homemade blend. Paying attention to the details helps ensure a pleasant experience every time you reach for the bottle.
Using Too Much Essential Oil
More is not always better.
Essential oils are highly concentrated, and excessive amounts increase the likelihood of skin irritation without necessarily improving the massage experience.
Stick to recommended dilution guidelines for adult topical use.
Skipping the Carrier Oil
Applying undiluted essential oils directly to the skin is one of the most common DIY mistakes.
Carrier oils help:
- Spread the blend evenly
- Slow absorption
- Reduce irritation
- Improve glide during massage
Never replace the carrier oil with water, since essential oils do not dissolve in water.
Using Plastic Containers
Certain essential oils can gradually degrade some plastics.
Choose:
- Amber glass bottles
- Cobalt blue glass bottles
- Tight-fitting caps
Glass helps preserve both the fragrance and the quality of the blend.
Ignoring Expiration Dates
Essential oils and carrier oils eventually oxidize.
Discard the blend if you notice:
- A sour or rancid smell
- Significant color changes
- Cloudiness that wasn’t present originally
- Separation that doesn’t disappear after gentle shaking
Fresh ingredients always produce the best results.
Applying to Damaged Skin
Avoid using the blend on:
- Cuts
- Scrapes
- Sunburn
- Rashes
- Active skin irritation
Healthy, intact skin provides the safest surface for topical application.
Forgetting to Label Homemade Blends
A simple label prevents confusion later.
Include:
- Recipe name
- Mixing date
- Ingredients
- Suggested expiration date
Proper labeling becomes especially useful if you enjoy making several different essential oil blends throughout the year.
Storage Tips and Shelf Life
Proper storage helps preserve both the aroma and quality of your essential oil recipe for pain and inflammation. Heat, light, moisture, and air are the biggest factors that shorten the life of homemade blends.
Best Containers for Homemade Blends
Dark-colored glass bottles remain the preferred choice because they shield the oils from ultraviolet light.
Choose bottles with:
- Amber or cobalt glass
- Tight, leak-resistant lids
- Dropper or reducer inserts for easier dispensing
Avoid storing massage oils in clear bottles on countertops where they receive direct sunlight.
Ideal Storage Conditions
A cool, dry location is usually best.
Good storage spots include:
- Bedroom drawers
- Bathroom cabinets away from showers
- Linen closets
- Closed medicine cabinets that stay cool
Keep the bottle away from:
- Direct sunlight
- Radiators
- Window sills
- Hot vehicles
How Long Does the Blend Last?
Shelf life depends largely on the freshness of the carrier oil.
As a general guideline:
| Carrier Oil | Approximate Shelf Life of the Blend* |
| Fractionated coconut oil | 18–24 months |
| Jojoba oil | 18–24 months |
| Sweet almond oil | 6–12 months |
| Grapeseed oil | 3–6 months |
*Assumes fresh ingredients and proper storage in a sealed dark glass bottle.
If the carrier oil reaches its expiration date first, prepare a fresh batch even if the essential oils still smell pleasant.
Can You Refrigerate It?
Refrigeration is optional but can extend the life of some carrier oils, particularly grapeseed oil.
A chilled blend may become slightly thicker. Simply let the bottle sit at room temperature for several minutes before use to restore a smooth consistency.
When It’s Time to Make a Fresh Batch
Replace the blend if you notice:
- An off or rancid odor
- Changes in color or texture
- Reduced fragrance intensity
- Visible contamination inside the bottle
Making smaller batches every few months is often the best strategy. Freshly blended oils typically provide the most enjoyable aroma and help ensure your massage oil remains pleasant to use whenever muscle or joint comfort is part of your self-care routine.
Frequently Asked Questions About Essential Oil Recipes for Pain and Inflammation
Which essential oil is best for muscle soreness?
No single essential oil works best for everyone. Lavender, peppermint, eucalyptus, ginger, and frankincense are among the most popular choices because they create a balanced massage blend with relaxing, cooling, and warming aromatic qualities.
Can I use this essential oil recipe for pain and inflammation every day?
Many healthy adults can use a properly diluted massage oil once or twice daily if their skin tolerates it well. Stop using the blend if redness, itching, or irritation develops.
How long does one batch last?
A 2-ounce (60 ml) bottle typically lasts several weeks to a few months, depending on how frequently it is used. Shelf life depends primarily on the carrier oil and storage conditions.
Can I apply the blend after exercise?
Yes. Many people enjoy using the blend after stretching or showering following a workout. Gentle massage may help muscles feel more relaxed while the aromatic oils enhance the overall recovery experience.
Is the recipe safe during pregnancy or for children?
Certain essential oils are not recommended during pregnancy, while breastfeeding, or for young children. Always consult a qualified healthcare provider before using essential oils in those situations, and avoid assuming that “natural” automatically means safe.
Can I combine this blend with lotions or other topical products?
You can, but introduce only one new product at a time. Mixing several scented products may increase the chance of skin irritation or make it difficult to identify which ingredient caused a reaction.
Can I make a larger batch?
Absolutely. Double or triple the recipe while keeping the same ratio of carrier oil to essential oils. Mixing larger quantities only makes sense if you expect to use the blend before the carrier oil reaches its expiration date.
Which carrier oil is best for sensitive skin?
Jojoba oil is often preferred because of its lightweight feel and excellent stability. Sweet almond oil is another popular option, although anyone with a tree nut allergy should choose an alternative carrier.
What should I do if the blend feels too strong?
Add more carrier oil instead of reducing the quality of the recipe. Increasing the carrier oil lowers the concentration of essential oils, creating a gentler blend for topical use.
Make Your Essential Oil Recipe for Pain and Inflammation Part of Your Self-Care Routine
Creating an essential oil recipe for pain and inflammation at home is a simple project that combines quality ingredients, careful dilution, and thoughtful application. Choosing fresh essential oils, pairing them with a nourishing carrier oil, and following safe blending practices helps produce a massage oil that is enjoyable to use whenever muscles or joints need a little extra attention.
Small adjustments allow you to personalize the recipe with cooling, warming, or gentle variations while maintaining a skin-friendly concentration. Proper storage in a dark glass bottle also helps preserve the blend’s aroma and quality, ensuring each application feels as fresh as the first.
Remember that homemade massage oils work best as part of a broader wellness routine that may include stretching, regular movement, hydration, and adequate rest. Persistent or severe pain deserves evaluation by a qualified healthcare professional rather than self-treatment alone.
Give the recipe a try, experiment with the suggested variations to find your favorite blend, and keep a bottle ready for post-workout recovery or relaxing evening massages. If you enjoy making DIY wellness products, save the recipe for future batches and share it with friends or family who appreciate natural self-care solutions.
