
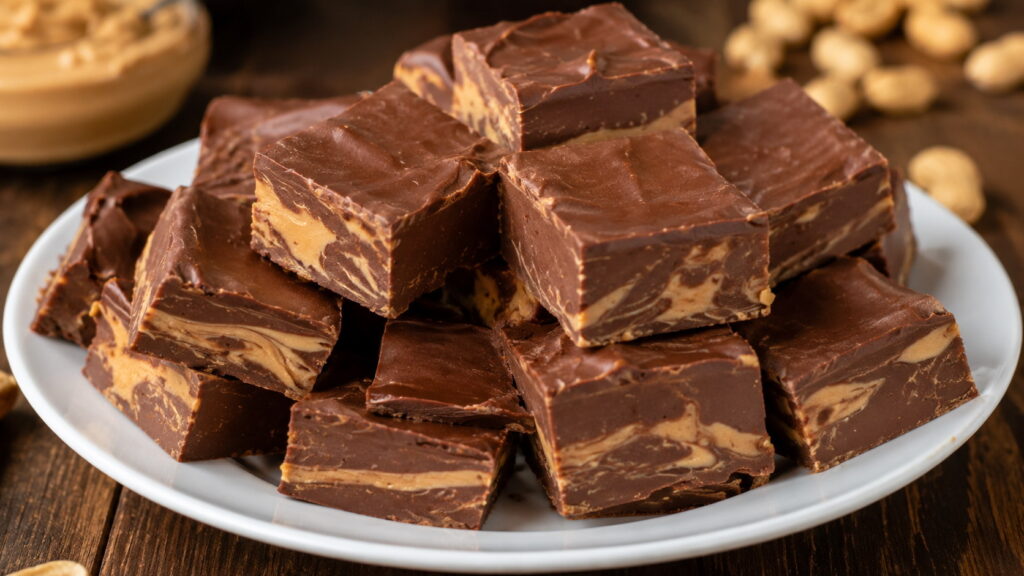
Old fashioned chocolate peanut butter fudge recipe lovers know there’s something special about making fudge the traditional way. This guide walks you through exactly how to create rich, creamy, perfectly set fudge using time-tested stovetop techniques—no shortcuts, no guesswork.
You’ll learn how to control sugar stages, choose the right ingredients, and avoid the most common mistakes that lead to grainy or soft fudge. Expect practical tips, clear instructions, and reliable results whether you’re making this for the holidays, gifting, or simply satisfying a chocolate craving.
In This Article
Why This Old Fashioned Chocolate Peanut Butter Fudge Recipe Still Wins Hearts
Classic fudge stands out because of its deep, cooked sugar flavor and smooth, melt-in-your-mouth texture. Unlike quick microwave versions, the traditional method develops complexity that shortcuts simply can’t replicate.
That balance between chocolate and peanut butter is what makes this recipe unforgettable. Chocolate brings richness, while peanut butter adds creaminess, nuttiness, and a slightly salty contrast that keeps every bite interesting.
Homemade fudge also offers control. You decide the sweetness level, texture, and add-ins. That makes it perfect for:
- Holiday dessert trays
- Homemade edible gifts
- Small-batch treats with premium ingredients
- Beginner cooks ready to learn classic candy-making
Key takeaway: Once you master this method, you can recreate consistent, bakery-quality fudge anytime.
What Makes an Old Fashioned Chocolate Peanut Butter Fudge Recipe Different?
The defining feature of an old fashioned chocolate peanut butter fudge recipe is the stovetop sugar-cooking method. Instead of melting pre-made chocolate, you cook sugar, milk, and cocoa to a precise temperature.
Traditional Method vs Modern Shortcut
| Method | Technique | Result |
| Old-fashioned | Cooked to soft-ball stage | Smooth, creamy, structured |
| Microwave fudge | Melt-and-mix | Softer, often less stable |
Cooking the mixture to the soft-ball stage (around 235–240°F / 113–116°C) ensures the fudge sets properly while staying creamy instead of crumbly.
According to the USDA Kitchen Tips, precise temperature control plays a key role in sugar-based recipes because it determines texture and structure.
Why Technique Matters
- Undercooking → fudge won’t set
- Overcooking → dry or crumbly texture
- Improper beating → grainy consistency
Timing and patience matter here. Letting the mixture cool slightly before beating allows controlled crystallization, which creates that signature smooth texture.
Important: Old-fashioned fudge is less forgiving than shortcut recipes—but far more rewarding when done right.
Ingredients That Build the Perfect Old Fashioned Chocolate Peanut Butter Fudge
Great fudge starts with simple ingredients used correctly. Each one has a specific role in texture and flavor.
Core Ingredients
- Granulated sugar – Provides structure and sweetness
- Unsweetened cocoa powder or baking chocolate – Creates deep chocolate flavor
- Milk or evaporated milk – Adds moisture and helps dissolve sugar evenly
- Peanut butter – Delivers creaminess and rich nutty flavor
- Butter – Improves mouthfeel and gives a glossy finish
- Vanilla extract – Enhances and rounds out flavor
Ingredient Tips for Best Results
- Use creamy peanut butter for smooth texture (avoid overly oily natural versions unless well-stirred)
- Choose high-quality cocoa or chocolate for a richer taste
- Evaporated milk gives a slightly thicker, creamier consistency than regular milk
- Butter should be real, not margarine, for best flavor
Optional Add-Ins
- Chopped roasted peanuts for crunch
- Sea salt flakes for contrast
- Chocolate chips or white chocolate swirl
- Crushed cookies for texture variation
Pro tip: Keep ingredient measurements precise. Candy recipes depend on exact ratios, so even small changes can affect the final texture.
Essential Tools for Foolproof Fudge
Successful old fashioned chocolate peanut butter fudge depends just as much on the right tools as it does on ingredients. Precision and heat control are everything.
Must-Have Equipment
- Heavy-bottom saucepan
Prevents hot spots and burning. Thin pans heat unevenly and can ruin the sugar mixture. - Candy thermometer
Critical for hitting the soft-ball stage (235–240°F / 113–116°C). Guessing often leads to failed fudge. - Wooden spoon or heatproof spatula
Sturdy enough for mixing thick fudge without melting or bending. - 8×8 or 9×9-inch baking pan
Gives the fudge its shape and thickness. - Parchment paper or foil lining
Makes removal and cutting much easier.
Optional but Helpful
- Offset spatula for smoothing the top
- Digital scale for precise ingredient measurement
- Timer to track cooking stages accurately
Pro tip: Set up your pan and measure all ingredients before turning on the heat. Fudge moves quickly once it reaches temperature, and delays can affect texture.
Step-by-Step Old Fashioned Chocolate Peanut Butter Fudge Recipe
This method focuses on control, timing, and visual cues. Follow each step closely for consistent, creamy results.
Recipe Snapshot
- Prep time: 10 minutes
- Cook time: 15–20 minutes
- Cooling time: 2 hours
- Total time: About 2 hours 30 minutes
- Servings: 16–25 squares
Instructions
- Prepare the pan
Line your baking pan with parchment paper, leaving overhang on the sides for easy lifting later. - Combine base ingredients
In a heavy saucepan, mix:- Sugar
- Cocoa (or chocolate)
- Milk
- Stir gently over medium heat until everything dissolves.
- Bring to a boil
Allow the mixture to come to a steady boil.
Stop stirring once it begins boiling to avoid unwanted crystallization. - Cook to soft-ball stage
Attach your thermometer and cook until it reaches 235–240°F (113–116°C).
This usually takes 8–12 minutes.
Visual cue: Bubbles become thicker and slower as it approaches temperature. - Remove from heat and add flavorings
Immediately remove from heat. Add:- Butter
- Peanut butter
- Vanilla extract
- Do not stir yet—let it sit for 3–5 minutes.
- Beat the mixture
Begin stirring steadily until the mixture thickens and loses its glossy shine.
This step creates the creamy texture.
Texture cue: It should become slightly matte and hold shape when stirred. - Pour and set
Quickly pour into the prepared pan and smooth the top.
Let it cool at room temperature for at least 2 hours. - Cut and serve
Lift out using parchment, then slice into squares.
Important: Work quickly once beating begins. Fudge can set fast, and delays may result in uneven texture.
The Science Behind Perfect Fudge Texture
Understanding what’s happening behind the scenes helps you make perfect fudge every time.
The Soft-Ball Stage Explained
At 235–240°F, sugar syrup reaches a concentration where it forms a soft, flexible ball when dropped into cold water. This stage determines the final texture:
- Lower temperature → too soft, won’t set
- Higher temperature → too firm or crumbly
Sugar Crystallization
Fudge is all about controlling crystal formation.
- Too many large crystals → grainy fudge
- Small, controlled crystals → smooth and creamy texture
That’s why:
- Stirring stops during boiling
- Cooling happens before beating
- Beating controls crystal size
Why Beating Matters
Beating the mixture as it cools introduces structure. It transforms a glossy liquid into a thick, creamy mass.
- Underbeating → fudge stays too soft
- Overbeating → fudge becomes stiff and crumbly
Key insight: Perfect fudge comes from balancing temperature, timing, and motion—not just ingredients.
Pro Tips for Creamy, Smooth Old Fashioned Chocolate Peanut Butter Fudge
Small technique adjustments make a big difference in traditional fudge. These tips help you achieve that silky, melt-in-your-mouth texture every time.
Timing and Temperature Control
- Use a thermometer and trust it. Even a few degrees off can change the texture.
- Cook over medium, steady heat to avoid scorching the sugar.
- Remove from heat immediately once you hit 235–240°F.
Master the Cooling and Beating Stage
- Let the mixture sit undisturbed for 3–5 minutes before beating.
- Start beating when it’s still warm but no longer piping hot.
- Stir steadily—not aggressively—until it thickens and loses shine.
Texture-Perfecting Tricks
- Avoid stirring once boiling starts to prevent large sugar crystals.
- Add a tiny pinch of salt to enhance flavor balance.
- Lightly butter your knife before cutting for clean edges.
Climate Matters More Than You Think
Humidity can affect fudge consistency.
- On humid days, fudge may stay softer
- Slightly extend cooking time by 1–2 minutes if needed
- Store in a cool, dry place for best results
Pro tip: If unsure, test a drop in cold water. It should form a soft, pliable ball—that’s your signal you’re on track.
Common Mistakes to Avoid When Making Old Fashioned Chocolate Peanut Butter Fudge
Even experienced cooks run into issues with traditional fudge. Knowing what to avoid can save an entire batch.
Frequent Fudge Problems
- Skipping the thermometer
Leads to inconsistent results and guesswork - Cooking over high heat
Causes scorching and uneven sugar cooking - Stirring during boiling
Triggers unwanted crystallization → grainy texture - Adding peanut butter too early
Can interfere with proper sugar structure - Not preparing the pan in advance
Fudge may set before you’re ready to pour
Quick Troubleshooting Guide
| Problem | Likely Cause | Fix |
| Grainy texture | Stirring too soon or too much | Avoid stirring during boil |
| Too soft | Undercooked sugar | Reheat and cook to correct temp |
| Too hard/crumbly | Overcooked | Add a splash of milk and gently reheat |
| Oily surface | Peanut butter separation | Mix thoroughly during beating |
Important: Most fudge failures come down to temperature accuracy and timing—not the ingredients themselves.
Easy Variations to Customize Your Chocolate Peanut Butter Fudge
Once you’ve mastered the base old fashioned chocolate peanut butter fudge recipe, you can easily adapt it to suit different tastes and occasions.
Flavor Twists
- Swirled Chocolate Fudge
Add melted dark or white chocolate and gently swirl before setting. - Salted Peanut Butter Fudge
Sprinkle flaky sea salt on top just before it sets for a sweet-salty contrast. - Extra Chocolate Boost
Fold in chocolate chips after cooking for a richer bite.
Texture Variations
- Crunchy Peanut Fudge
Stir in chopped roasted peanuts for added texture. - Crispy Fudge
Add crispy rice cereal for a light crunch.
Dietary Adjustments
- Dairy-Free Option
Use plant-based butter and coconut milk (note: texture may vary slightly). - Reduced Sugar Attempt
Possible, but tricky—sugar controls structure. Reducing it can affect how the fudge sets.
Creative Serving Ideas
- Shape into small gift cubes
- Layer with caramel for a dessert bar
- Crumble over ice cream or brownies
Pro tip: Test small batches when trying variations. Fudge chemistry is delicate, so minor tweaks can change the final result.
Serving Ideas for Old Fashioned Chocolate Peanut Butter Fudge
Serving this old fashioned chocolate peanut butter fudge recipe is where you can get creative. Its rich flavor pairs beautifully with both simple and elevated presentations.
Classic Ways to Serve
- Cut into bite-sized squares for easy snacking
- Arrange on a holiday dessert platter with cookies and truffles
- Serve slightly chilled for a firmer texture or at room temperature for extra creaminess
Dessert Pairings
- Warm brownies topped with fudge cubes
- Vanilla ice cream with crumbled fudge pieces
- Cheesecake garnish for added richness
Beverage Pairings
- Freshly brewed coffee or espresso
- Cold milk for a classic combination
- Hot chocolate for a double chocolate experience
Gifting Ideas
- Wrap in parchment and place in decorative boxes
- Layer in mason jars for a rustic look
- Add handwritten labels for a personal touch
Tip: Use a warm knife (run under hot water, then dry) to cut clean, professional-looking pieces.
How to Store and Keep Fudge Fresh Longer
Proper storage keeps your fudge tasting just as good days later.
Room Temperature Storage
- Store in an airtight container
- Keep in a cool, dry place away from direct sunlight
- Best consumed within 1 week
Refrigerator Storage
- Extend shelf life up to 2–3 weeks
- Wrap tightly to prevent drying out
- Allow to come to room temperature before serving for best texture
Preventing Common Storage Issues
- Separate layers with parchment paper to avoid sticking
- Keep away from moisture to prevent a sticky surface
- Avoid frequent temperature changes
Key tip: Airtight storage is essential to maintain that creamy consistency.
Can You Freeze Old Fashioned Chocolate Peanut Butter Fudge?
Freezing is a great option if you want to make fudge ahead or store leftovers long-term.
How to Freeze Fudge Properly
- Cut fudge into portions
- Wrap each piece tightly in plastic wrap
- Place in a freezer-safe container or zip bag
- Label with the date
Storage Timeline
- Freeze for up to 2–3 months for best quality
How to Thaw
- Transfer to the refrigerator overnight
- Bring to room temperature before serving
When Freezing Works Best
- For plain fudge without delicate toppings
- For batch preparation before holidays
Tip: Avoid microwaving to thaw, as it can alter texture and cause melting.
Make-Ahead Tips for Holidays and Events
Planning ahead makes this old fashioned chocolate peanut butter fudge recipe even more convenient.
Smart Prep Strategies
- Make fudge 2–3 days in advance for best flavor development
- Store in airtight containers until ready to serve or gift
- Cut into pieces just before serving for a fresher appearance
Scaling the Recipe
- Double batches carefully—use a larger pan and pot
- Ensure even heating when increasing quantities
- Avoid overcrowding the saucepan
Transport Tips
- Use sturdy containers to prevent breakage
- Keep cool during travel to maintain structure
- Avoid stacking heavy items on top
Pro tip: Slightly chilled fudge travels better and keeps its shape longer.
Frequently Asked Questions About Old Fashioned Chocolate Peanut Butter Fudge Recipe
Why did my fudge turn grainy?
Grainy texture usually comes from stirring during boiling or improper cooling before beating. Controlled crystallization is key to smooth fudge.
Can I make fudge without a candy thermometer?
Yes, but it’s less reliable. Use the cold water test—drop a bit into cold water; it should form a soft ball. A thermometer still gives the most consistent results.
Why didn’t my fudge set properly?
Undercooking is the most common cause. The mixture likely didn’t reach the soft-ball stage, so it remained too soft.
Can I use natural peanut butter?
You can, but results vary. Natural peanut butter can separate and affect texture. Stir it well or use stabilized peanut butter for consistency.
How do I fix fudge that didn’t harden?
Return it to the pan, add a small splash of milk, and reheat gently. Cook again to the correct temperature, then repeat the cooling and beating process.
How long does homemade fudge last?
At room temperature, about 1 week. Refrigerated, it can last up to 3 weeks if stored properly.
Can I make this recipe ahead of time?
Yes, fudge is ideal for make-ahead desserts. Prepare a few days in advance and store in airtight containers.
Final Thoughts: Mastering the Old Fashioned Chocolate Peanut Butter Fudge Recipe
Mastering this old fashioned chocolate peanut butter fudge recipe gives you more than just a dessert—it builds confidence in classic candy-making techniques. Each batch teaches you how sugar behaves, how texture forms, and how small details create big results.
Once you’ve nailed the basics, try experimenting with flavors, textures, and presentation styles to make it your own. Save this recipe for holidays, share it as a thoughtful homemade gift, or keep a batch ready for whenever a chocolate craving hits.
Give it a try, trust the process, and enjoy every rich, creamy bite.
